|
Upload The Excel File |
  
|
|
Upload The Excel File |
|
Below represents a typical screen shot for how Excel files are uploaded through the 'Time Saver' screens. See the previous section on information about the series of events typically performed in uploading data within EnergySteward.com .
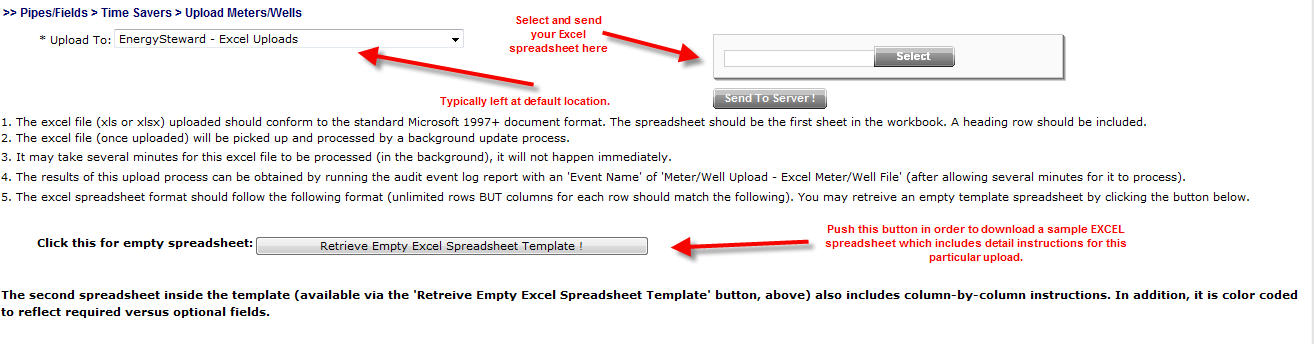
Upload To (Location, drop down list box) - This indicates the system name where the Excel upload file (xls) will be posted. When you upload the Excel file it will be stored on system servers within a specific path, referenced by this name. The folder which gets posted is a 'monitored' folder (every x seconds the upload process looks for the existence of new upload files). This should rarely be changed from its default location. The 'behind the scenes' paths assigned to these names are setup by system administrators.
Excel File (file upload area) - This is where you upload the Excel (xls) file. Here are the steps:
| 1. | Click the "Select" button. |
| 2. | A file explorer box pops up. Find the "xls" file on your local drive or network drive, then select ok. |
| 3. | The file name (with local path) will be grayed out, yet appear in the box to the left of the "Select" button. |
| 4. | Click the "Send To Server" button. |
| 5. | This uploads the file to the appropriate server location (see "Upload To" description above). |
| 6. | You will get a 'successful' notification on the screen when it is finished. |
Retrieve Empty Excel Spreadsheet Template (button) - Push this button in order to retrieve an empty Excel spreadsheet which includes instructions (typically on the second sheet within the workbook). After retrieving the template, it can be used to store the actual data and then RE-submitted through this screen to do the actual upload. All of the important documentation and information relative to the format, data requirements, how it updates are kept within the upload instructions for the upload you wish to perform.